

To use an OBD2 scanner, park safely, connect it to the 16-pin diagnostic port, switch the ignition on as instructed, identify the vehicle, run a health or OBD2 scan, and save the codes, status, freeze frame, and readiness results before clearing anything. Diagnose and repair the cause, then clear eligible codes only if appropriate and rescan after a verification drive.
The buttons and menu names vary, but a reliable diagnostic workflow stays the same: preserve evidence first, use data to narrow the cause, and verify the repair. This guide applies that workflow to handheld and Bluetooth OBD2 scanners without assuming that every tool can access every vehicle module.
Before You Connect an OBD2 Scanner
- Read the vehicle and scanner instructions. Some functions require key on/engine off; live data requires the engine running; programming and special functions can have stricter voltage and connection requirements.
- Park in a ventilated, safe area. Apply the parking brake and select Park or Neutral as the vehicle instructions require. Never run an engine in an enclosed space.
- Check battery condition. Low vehicle voltage can interrupt communication and create misleading module faults. Voltage stability is especially important for active tests, adaptations, coding, or software operations.
- Do not interact with a scanner while driving. Have a second person operate the tool when road data is necessary, or use safe recording features and review the data after stopping.
- Know your goal. Reading a check-engine light, scanning every module, graphing live data, and running an active test are different jobs that need different tool coverage.
Stop for serious symptoms. A flashing check-engine light can indicate severe misfire. Overheating, low oil pressure, fuel odor, smoke, stalling, or major mechanical noise also needs immediate attention. Scanning should not delay safe shutdown or professional help.
How to Use an OBD2 Scanner Step by Step
Find the 16-pin data link connector, normally under the driver's side of the dashboard. Do not force a connector that is misaligned or damaged.
With the ignition off unless the tool instructions say otherwise, plug in the cable or Bluetooth adapter fully. Many tools power up from the vehicle connector.
For an initial code scan, this is commonly ignition on with the engine off. Push-button vehicles may require pressing the start button without the brake pedal. Follow the vehicle and tool prompts.
For a Bluetooth scanner, install the official app, enable the required phone permissions, pair through the method in the product guide, and select the connected vehicle interface.
Use AutoVIN if supported, then verify the displayed VIN and vehicle details. If automatic identification fails, enter the make, model, year, engine, and other requested information manually.
Use generic OBD2 for emissions-related engine diagnostics. Use auto scan or health report when the tool and vehicle support multiple control modules and the problem may extend beyond the engine.
Record or export the complete results before erasing data, disconnecting the battery, replacing parts, or performing resets.
Research exact code definitions for the vehicle, inspect related components and wiring, compare relevant data, and perform the specified tests before replacing anything.
After the repair, erase eligible codes if the procedure calls for it. Rescan after the required operating conditions or drive cycle and confirm that symptoms, codes, and warning lights do not return.
What Should You Save Before Clearing Codes?
| Information | Why it matters | What to record |
|---|---|---|
| DTC and module | The same code number or description can have different context across systems and vehicles. | Full code, status, module name, and description. |
| Freeze frame | Shows selected conditions when an emissions fault was stored. | RPM, load, speed, temperature, fuel trims, and available sensor values. |
| Readiness monitors | Shows whether self-tests have completed; clearing resets many monitors to not ready. | Complete, incomplete, and unsupported monitors. |
| MIL status | Scanner-reported commanded status helps separate current dashboard behavior from stored history. | On/off status and whether the lamp is steady or flashing. |
| Full health report | Multiple low-voltage or communication codes can reveal a shared cause. | All modules, all codes, time, mileage, and vehicle voltage. |
How to Read Scanner Results Without Guessing
Start with code status
A pending code may represent an early or one-trip detection. A stored or confirmed code has met the system's confirmation criteria. A permanent emissions DTC cannot be erased with a scanner or battery disconnect; after repair, the vehicle's own OBD logic removes it only when the relevant monitor verifies the fault is gone.
Use freeze frame to recreate the condition
Compare whether the engine was cold or warm, idling or under load, moving or stationary. A lean code recorded at idle suggests a different test path from the same code recorded only at higher load. Freeze frame is evidence, not a complete diagnosis.
Graph only the data that answers your question
Watching dozens of parameters at once creates noise and can slow the update rate. Select a small group of related values and compare them under controlled conditions. Our OBD2 live-data guide explains fuel trims, oxygen-sensor behavior, MAF, and coolant temperature in context.
Separate symptom, code, and root cause
A code reports what a monitor detected. For example, a lean condition can result from unmetered air, low fuel delivery, exhaust leakage, measurement error, or another fault. Replace a component only after the tests support that conclusion.
For a detailed explanation of code structure and scanner limits, see the OBD2 code reader guide.
When Should You Clear OBD2 Codes?
Clear eligible codes after saving the original evidence and completing the repair, or when a vehicle-specific test procedure explicitly directs you to clear them. Do not clear first just to see what returns: it can erase freeze frame, reset readiness monitors, and remove clues that make an intermittent fault easier to find.
Emissions-test reminder: After codes are cleared or battery power is disconnected, readiness monitors may show not ready until the vehicle completes the required self-tests. A generic drive cycle cannot guarantee that every vehicle and monitor will complete; follow vehicle-specific information and recheck status.
If your only goal is turning off the warning, read how to clear a check-engine light safely before pressing Erase.
Choose the Scanner Around Your Workflow
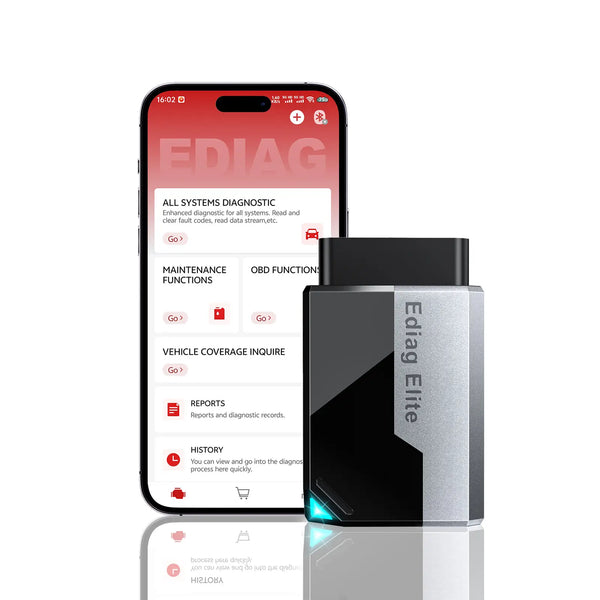
KINGBOLEN EDIAG Elite
Best fit: DIY owners who want a compact app-based scanner for code, data, full-system, and supported active-test workflows.
Keep the adapter in a small tool kit, use your iOS or Android screen, and move from a basic OBD2 scan to supported module data and tests when the diagnosis needs more context.
See capabilities and limits
- Current listing includes full OBD2 functions, live data, freeze frame, and I/M readiness.
- Supports full-system diagnosis, bidirectional controls, and 15+ service functions where available.
- Uses a compatible iOS or Android device and supports compatible CAN FD applications.
- Coverage, modules, service functions, and active tests vary by vehicle. Confirm the VIN and exact required function before purchase.
A phone-based scanner is convenient for personal vehicles and portable work. If you prefer a dedicated tablet for frequent diagnosis, larger live-data viewing, and supported advanced workflows, compare the KINGBOLEN K8 Pro. For a fuller buying decision, see app-based Bluetooth scanner vs diagnostic tablet.
Frequently Asked Questions
Should the engine be running when I connect an OBD2 scanner?
Why will my scanner not communicate with the vehicle?
Can an OBD2 scanner damage a car?
Can I leave a Bluetooth OBD2 adapter plugged in?
Why did the check-engine light return after I cleared it?
Does a successful scan mean every module was checked?
Bottom line: The best way to use an OBD2 scanner is evidence first: connect correctly, record codes and context, test the system, repair the cause, and verify. The EDIAG Elite is a natural fit when you want that workflow in a portable phone-based tool, while a dedicated tablet suits more frequent and advanced work.
Product details checked September 4, 2026. Diagnostic coverage and available functions vary by vehicle and module. Confirm the VIN and required function before purchase.

